Friday, June 15, 2012

Quilting Along With Leah Day - Week 18

Going Loopy - Week 18
Upper Right - Lots of "l's"


We are going loopy with Leah Day this week. Gone are the straight lines, sharp points and angles of recent weeks. Instead the lines are curved and peppered with loops.


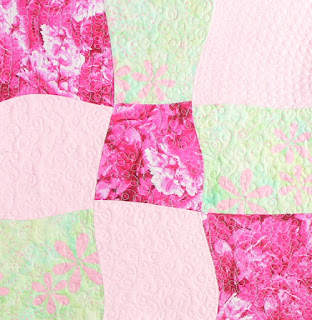
Once again, Leah broke down the assignment to its most basic and built up to the most complex over a series of small steps. Rather than approach this as I did in the past, by selecting a solid colored piece of fabric and marking chalk lines to both guide me and distinguish between the steps, I opted to quilt a practice block I had on hand. I stitched the four different levels of the assignment in the four corners and did the final free form in the remaining five pieces that form a plus sign.

The assignment reminded me of the exercises we would do in fourth grade when I was learning how to write in script. Rather than practice individual letters, we would create rows and rows of loops and  waves.

The machine quilting in the upper left is the most basic of the exercises. Leah described it as a row of "e's" but it was closer to how I write my "l's".

Upper Left - Upside Down "l's"

I thought the work in the upper right, which was an upside down version of the "l's," like the tails of many "y's" looked the best. I shortened the line between loops and focused on the just the loops.

Next, I tried my hands at alternating between "l's" and tails, much like an open, loosely flowing figure 8. It did flow smoothly, but wasn't particularly compelling to use as a quilting motif.

The final assigned pattern was to alternate between "w's" and "m's" with the middle of each letter being a loop. The advantage to this pattern was that you could cover a lot of ground quickly.


Once the formal patterns were complete I tried my hand at doodling loops.

My final thoughts on Going Loopy, is that worked up very easily. It is definitely the kind of stitching that I can float away on. My take away is that it is best suited for cranking out "lovey" quilts.


Lower Right - "g's"


Summer is here and so is my vacation. There will be no Musing from me for a couple of weeks. I look forward to catching up with you and sharing more of progress with Leah's assignments and my personal work when I return.

Lower Left - "M's" and "W's"

Monday, June 11, 2012

Quilting Along With Leah Day - Week 17

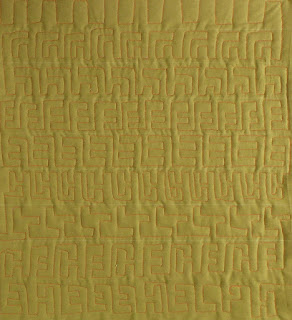
From Top to Bottom - U's, L's, Tessellated F's, H's
and Mixing and Matching
Leah Day is back from a much deserved time away from creating Quilt Along assignments to provide her groupies with the next challenge. When she left off Zippling was the topic. The distinguishing feature of Zippling is its sharp angles and straight lines. This week the focus was on the building blocks to create a Circuit Board quilting. Like Zippling, a Circuit Board  uses straight lines. However, the angle is no longer acute, instead all angles are right angles.

Leah had us start with the most basic shape of a circuit board - a squared U. Next we tried tessellated F's, an H and L combo, before ultimately attempting to design our own circuit board.

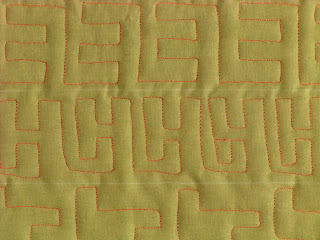
Detail Showing a Mix of Straight Lines, Solid Right Angles
and Some Beginner's Learning Gaffs
I find it easiest to mark my fabric with horizontal chalk lines in order to guide my scale when I am first learning a pattern like this one. It is like practicing script on lined paper versus blank paper. I was pleasantly surprised to find that I only got lost once while executing the various letter designs. (Naturally, that is the spot my husband focused in on when in photographed the close up of my practice.) For a first pass I managed to keep predominately straight lines and right angles. I found it helped to stop at the angle versus in the middle of a line. This made it easier to create the right angle. If I continued to run the machine as I executed a right a angle I would invariably soften the angle with a slight curve.

It is helpful to have many free motions patterns that I am comfortable with and can turn to, so that no matter what quilt I design, I have the perfect quilting pattern to accompany it. Would I use Circuit Board again? Probably not, at least until I am fluent enough with it to avoid channeling and the appearance of rows.

Tuesday, June 5, 2012

Hibiscus Haven is Done!

My Motivation
Persistence, faith and gumption is what it takes me to go from idea to completion of an artwork. When I start a new work it seems brilliant. That is the hook that motivates me to begin.  Somewhere in the middle a combination of panic and drudgery take over. The panic is due to whether I will be able to pull off a successful composition. The drudgery comes from the shear repetition of piecing and stitching that is a natural process of making the fiber art that speaks to me. Once I consider a work finished, as I do with Hibiscus Haven, my confidence, that dipped in the middle returns. There is the shear relief of completing the piece from beginning to end. There is also the sense, that yes, this will do. I have another work to add to my website and hang in galleries.

Hibiscus Haven is Done!


Detail Showing Floating Leaves and Binding Finish
Hibiscus Haven is my own design. However, Leah Day's genius in coming up with 365 different free motion quilting designs needs to be mentioned here. Her designs are my bible when selecting a motif to quilt into the background. I used her Floating Leaf pattern in Hibiscus Haven. Prior to Quilting Along with Leah, I probably would have done a small scale version of the design. However, now I am able to modify the scale of my free motion quilting, I chose to do this at a medium scale. I wanted the scale of the quilted leaves to match the appliquéd leaves. Another nod to Leah, is that I have always created bias binding and hand stitched it down on the backside of the quilt. Since, I had used the button hole stitch with the appliquéd leaves and hibiscus, I opted to use the button hole stitch to secure the binding to the front of the quilt, a method that Leah endorses.